Microsoft has removed the placeholder files (aka “smart files”) from OneDrive in Windows 10. This article will help you get back many of its features.
Solution
I have found a way to bring much of the functionality of placeholders back to Windows 10. It is not a perfect solution, but it can get the job done.
Before we get started, let me lay out the benefits and limitations of the solution.
Benefits:
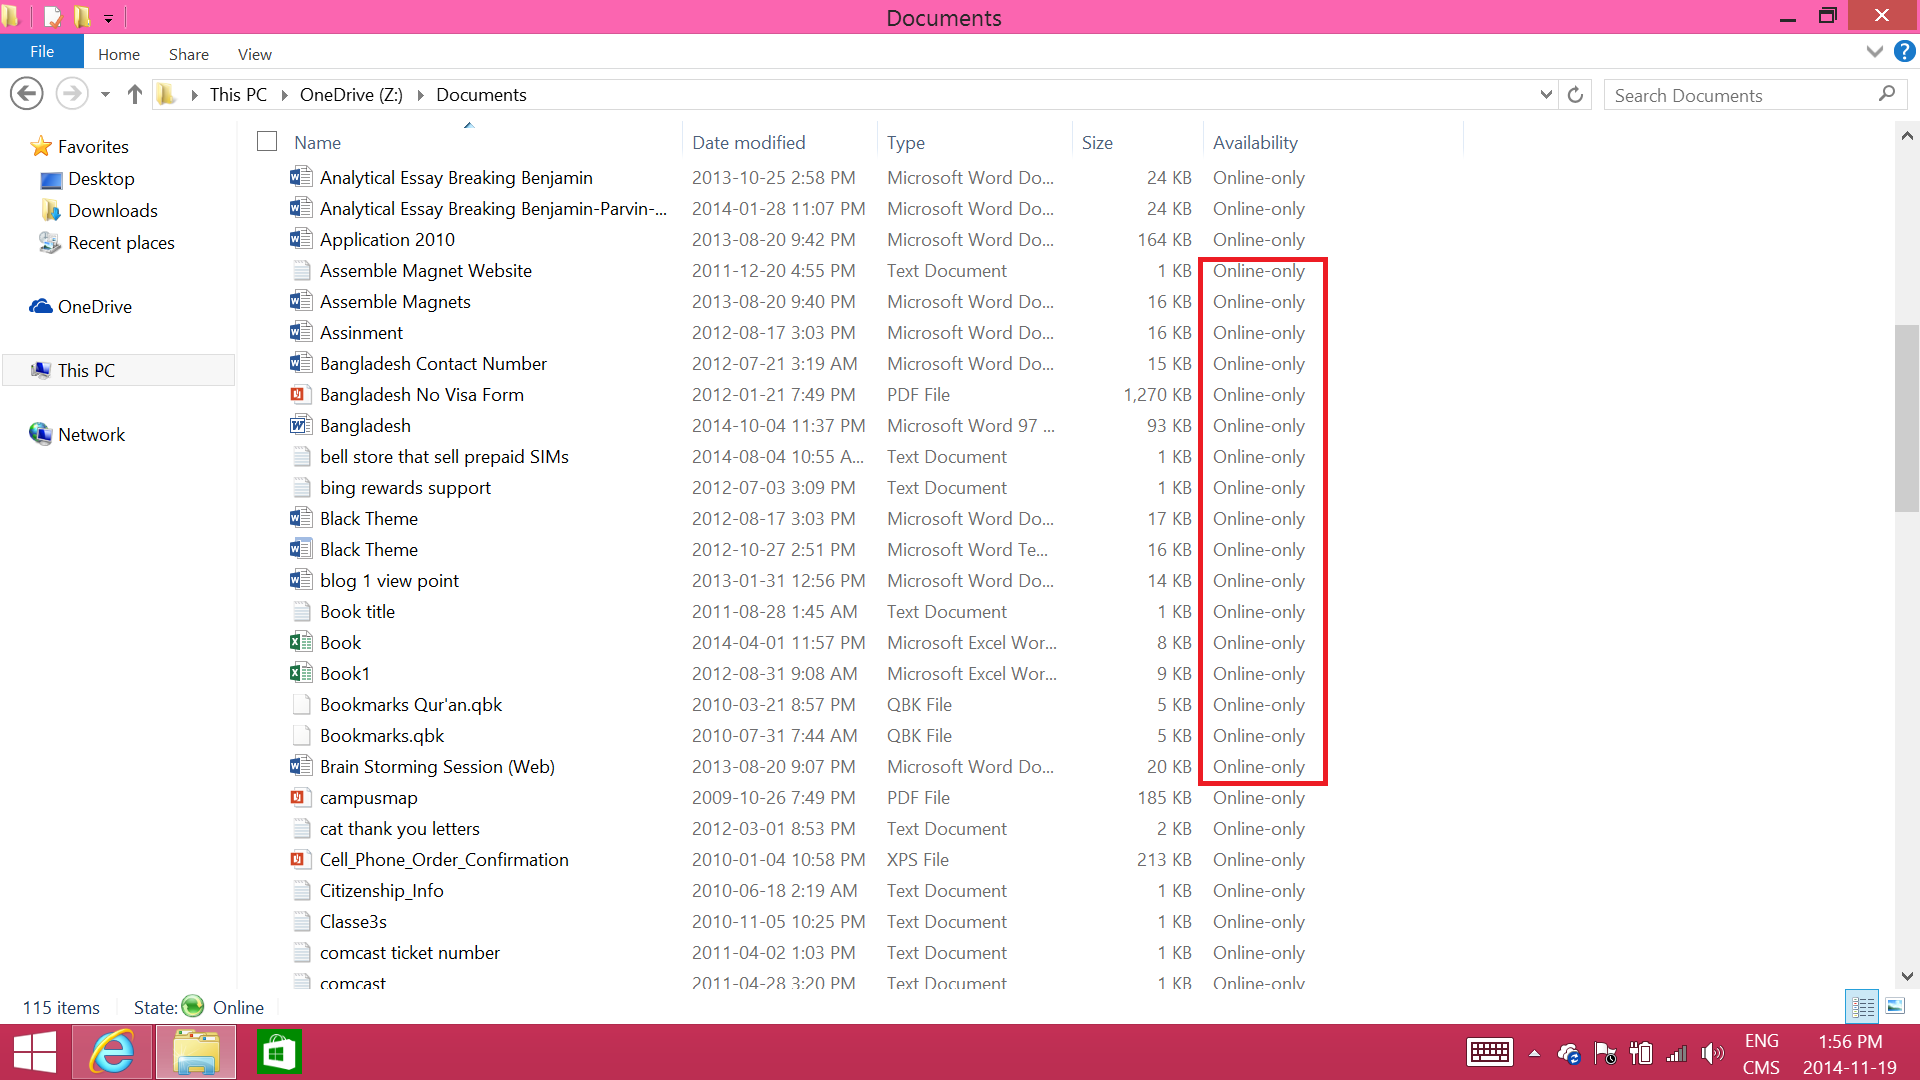
- You can browse all your OneDrive files right from File Explorer
- You can search all your OneDrive files without needing to sync them
- Very little amount of disk space will be utilized, if any.
- Thumbnail caching for instance will take up a tiny bit of space.
- You can open files right from within File Explorer and the appropriate programs will open to handle the files.
- You can add, rename, and remove files.
Limitations:
- You cannot browse the files if you are offline. Only files synced to the PC will be available offline.
- You must be online to add, delete, rename, our move files that are online only.
- The experience will be a bit slow (depending on the speed of your internet connection).
- You cannot right-click a file and use the “Make Available Offline” option. These files are always “Online Only”.
- In order to use files offline, you must use selective sync using the OneDrive application in Windows 10, or copy the online only files to a local folder, such as “Documents”, or “Pictures”.
Okay, so with that out of the way, let’s begin!
Step 1
Log in to OneDrive.com in your browser
Step 2
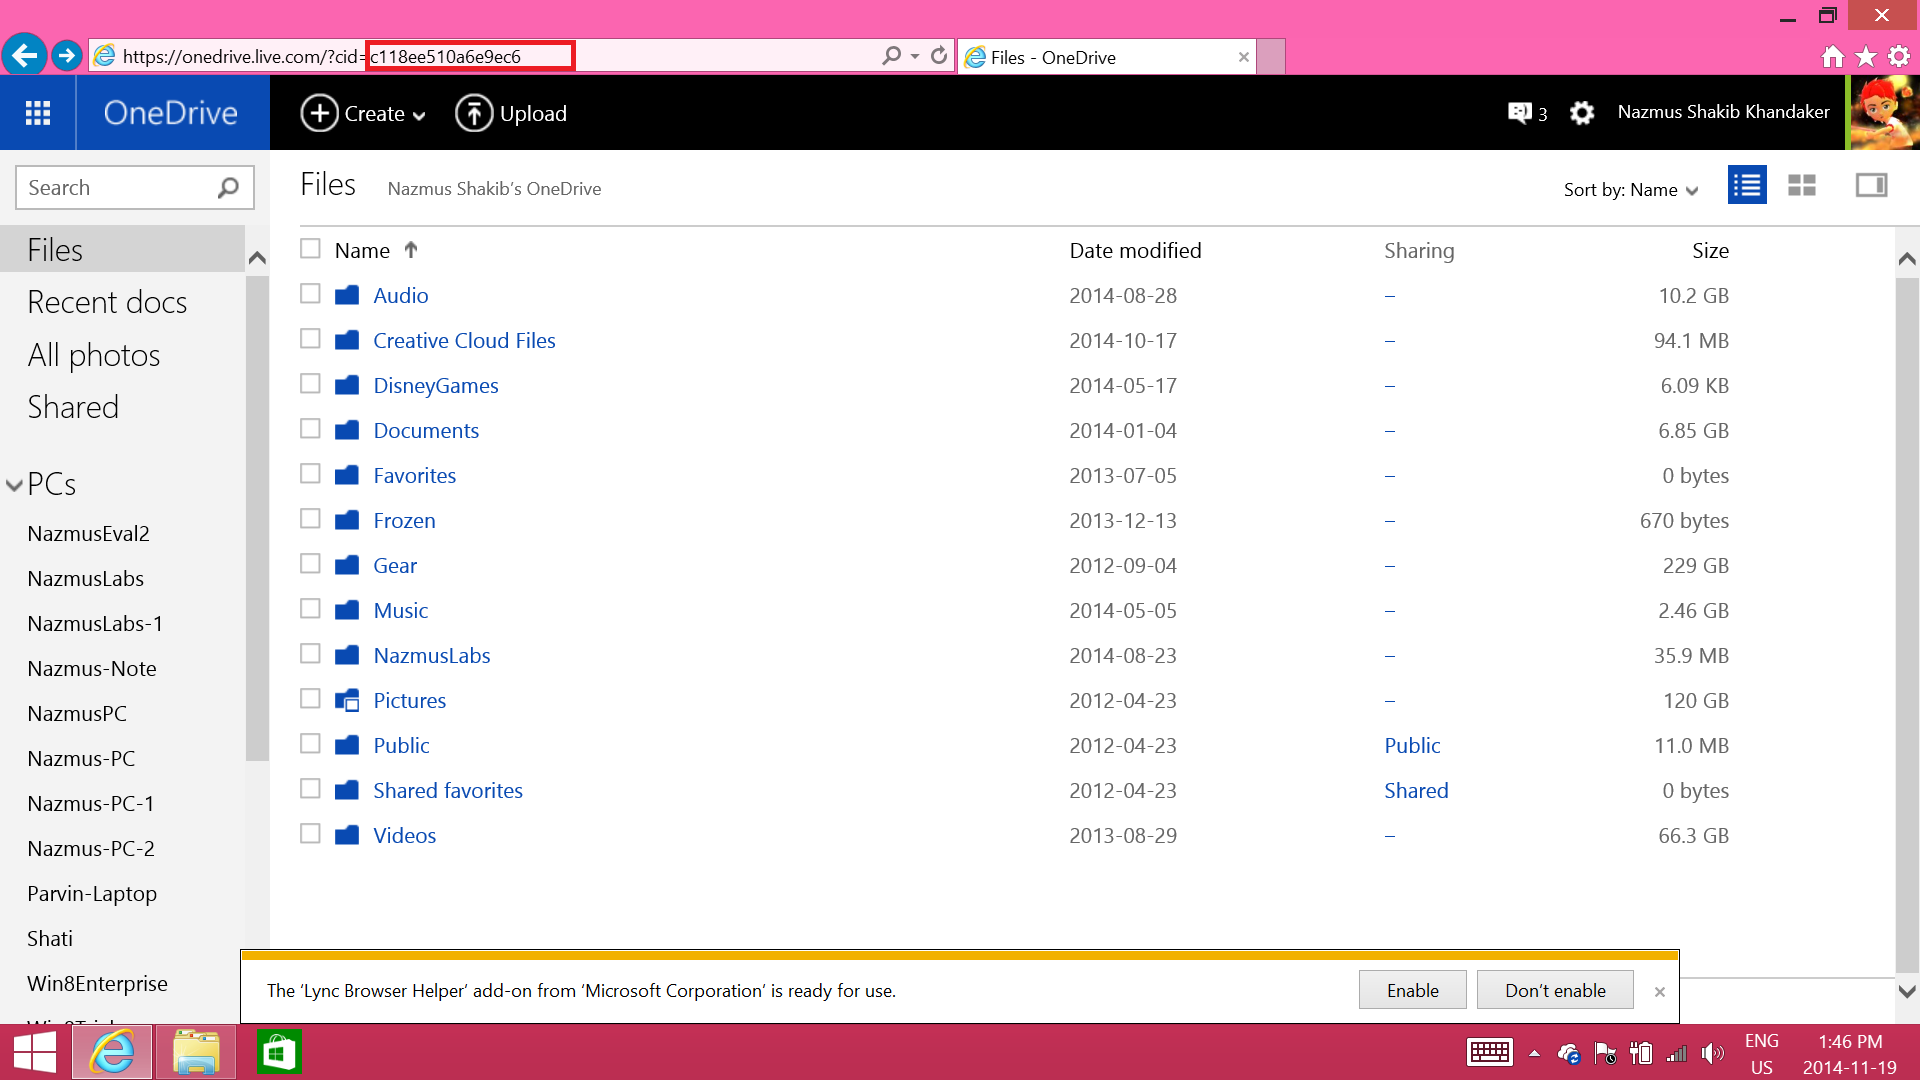
Click on “Files”, right below the search box
Step 3
Once signed in, in the Address Bar (aka URL bar): copy the part of the URL that comes after “?cid=” For example, my URL is https://onedrive.live.com/?cid=c118ee510a6e9ec6. I would only copy “c118ee510a6e9ec6”
Step 4
Open File Explorer and navigate to “This PC”.
Step 5
On the Ribbon, click “Computer”, and then click “Map Network Drive”.

Step 6
type in the following in the textbox labeled “Folder:”: “https://d.docs.live.net/”
Step 7
Paste in the portion of the URL you copied at the end of the text box. It should like something like this: “http://d.docs.live.net/The URL You Copied”. In my example, it looks like this: “https://d.docs.live.net/c118ee510a6e9ec6”.

Step 8
Click “Finish”. You will be asked to sign in to your Microsoft Account. Please enter your username and password. If you have enabled two-step authentication for your Microsoft Account, you will need to use an app-specific password.
Step 9
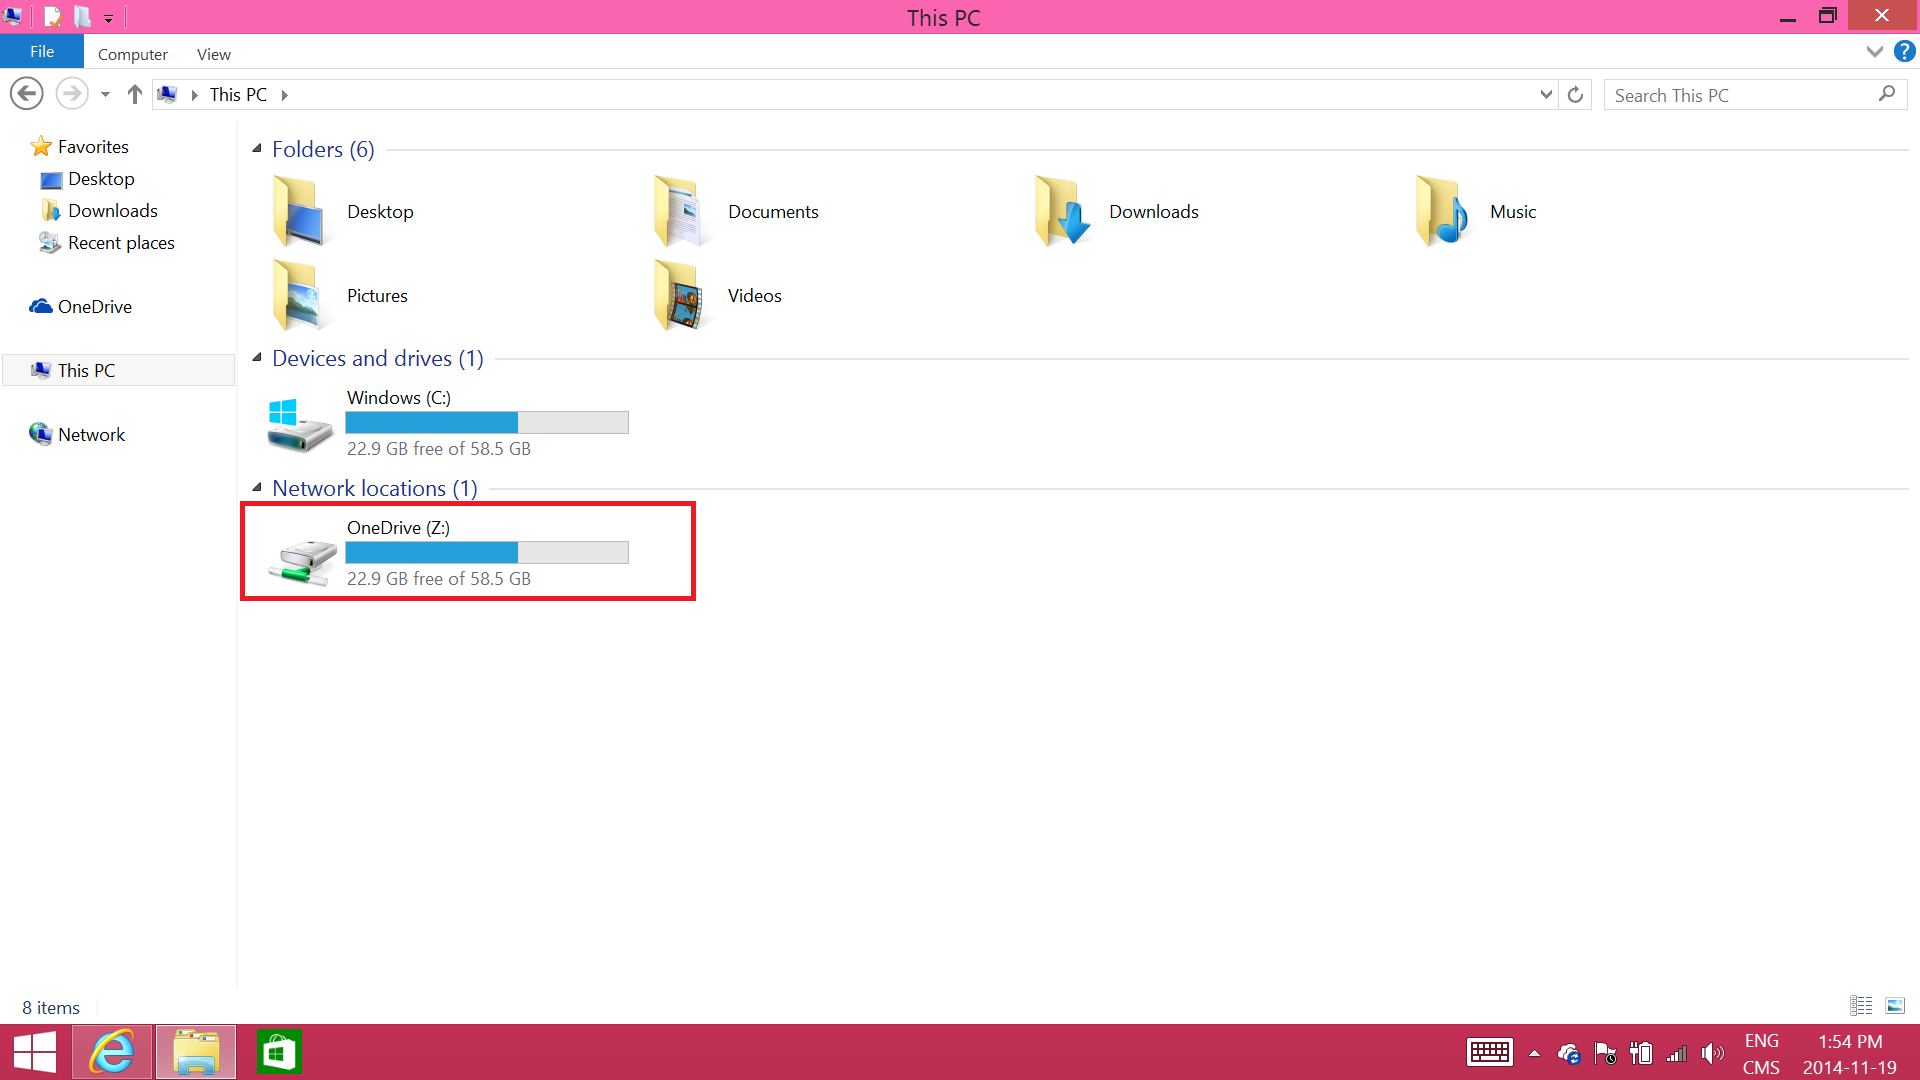
A Drive should appear on your “This PC” folder. Right-click on it and rename it to “OneDrive”.
You are done; enjoy!
If you have any questions, need help, or have any other comments, please right them down below, and will try our best to answer them.
Update:
Some are unable to get it working on their Windows 10 TP build 9879. However, I want to let you know that this my not be an issue with Windows 10 TP but some other issue. I and others, such as Rich Hey from Windows Observer have been able to get it working on Windows 10. We have two step authentication and are using an app password. The screenshots in this article are from Windows 8.1, but rest assured, that it does work in Windows 10 also.
It may definitely be a bug in Windows 10 affecting certain people, including our very own Denny McAkins, and Mauro from Pureinfotech.
Here’s a screenshot of the OneDrive network on Windows 10 TP Build 9879.






 McAkins Online
9 responses to “Browse all your OneDrive Files from File Explorer in Windows 10 (Build 9879)”
[…] Nazmus states on the blog post there are some limitations of using this […]
LikeLike
[…] Browse all your OneDrive Files from File Explorer in Windows 10 (Build 9879) | McAkins Online […]
LikeLike
Its a clunky solution. This proposed solution was the same work around to solve not being able to see your friends shared OneDrive files and folders with you in Windows like you can in the iOS OneDrive App, Android App, etc. MS really just needs to bring back the smartfile feature back.
LikeLike
I’ve tried it, but it doesn’t work for me, I always get the error “network path not found”. The weird thing is that it works on Windows 8.1, but not on two different instances of Windows 10 I’ve tried it on. Also in your snapshots above, it looks like you have done this on Windows 8.1, not Windows 10. Any clue?
LikeLike
We will look into this and get back to you guys.
LikeLike
OK guys, I have done an extensive test with Windows 10 TP Build 9879. It seems this solution is not working for now on Windows 10. If anyone is able to get it working please let me know. As for me, it doesn’t allow me to map the network drive because of authentication issues. I have got 2FA turned ON on my MS Account, as such it seems the WebDAV protocol has issues with 2FA in Win10TP for now. Attempt to create an App-Password didn’t work neither. So, it seems MS still has a lot to do on IE in Win10. I will pass this information to MS via the Win10TP Feedback App for IE. Let’s hope they fix it before IE 12 comes to play.
Keep us posted with your discoveries.
LikeLike
I am using Windows 10 Technical Preview Build 9879, and am able to get it working. I have 2 step authentication and app passwords also works. Rich Hey also is able to get it working. To answer another question, yes the screenshots are from Windows 8 because I wrote this article a Windows 8.1 machine. But I assure you that I have it working on build 9879.
LikeLike
You are a Genius! It works perfectly for me… I’ve even put a shortcut to my desktop and renamed it as ONEDRICE ONLINE so I don’t get confused. THANKS!!!!
LikeLike
[…] https://mcakins.com/2014/11/19/browse-all-your-onedrive-files-from-file-explorer-in-windows-10-build-… […]
LikeLike